12.5 Homework Assignment: Anomaly Detection in Automotive Data
12.5.1 Objective:
Explore anomaly detection techniques using the mtcars dataset to identify unusual observations in automotive specifications. Apply three different statistical methods: linear regression analysis, k-Nearest Neighbors (k-NN), and Random Forest.
12.5.2 Dataset:
The mtcars dataset available in R contains data on 32 automobiles (1973-74 models) with 11 variables such as MPG (miles per gallon), number of cylinders, horsepower, and weight.
12.5.3 Instructions:
Step 1: Setup and Data Loading
- Load the necessary R packages. If not installed, install them using the commands from the setup block at the beginning of this chapter.
- Load the mtcars dataset and explore its structure using head() and summary() functions.
| mpg | cyl | disp | hp | drat | wt | qsec | vs | am | gear | carb |
|---|---|---|---|---|---|---|---|---|---|---|
| 21 | 6 | 160 | 110 | 3.9 | 2.62 | 16.5 | 0 | 1 | 4 | 4 |
| 21 | 6 | 160 | 110 | 3.9 | 2.88 | 17 | 0 | 1 | 4 | 4 |
| 22.8 | 4 | 108 | 93 | 3.85 | 2.32 | 18.6 | 1 | 1 | 4 | 1 |
| 21.4 | 6 | 258 | 110 | 3.08 | 3.21 | 19.4 | 1 | 0 | 3 | 1 |
| 18.7 | 8 | 360 | 175 | 3.15 | 3.44 | 17 | 0 | 0 | 3 | 2 |
| 18.1 | 6 | 225 | 105 | 2.76 | 3.46 | 20.2 | 1 | 0 | 3 | 1 |
Step 2: Data Preparation
- Convert categorical variables (if any) to factor variables. In mtcars, convert cyl, vs, am, and gear into factors using the mutate() function from dplyr.
mtcars.df <- mtcars |>
mutate(cyl = as.factor(cyl),
 vs = as.factor(vs),
 am = as.factor(am),
 gear = as.factor(gear)) |>
  dummy_cols(remove_first_dummy = TRUE) |>
  select(-where(is.factor))

row.names(mtcars.df) <- row.names(mtcars)
Step 3: Anomaly Detection using Linear Regression - Fit a linear regression model with MPG as the dependent variable and all other variables as predictors.
- Calculate and inspect residuals. Consider observations with residuals greater than 2 standard deviations from the mean as potential outliers.
# Define threshold as 2 standard deviations from the mean residual
threshold <- 2 * sd(lm_model$residuals)

# Create a dataframe for plotting the residuals and their corresponding fitted values
plot_data <- data.frame(
  Fitted = lm_model$fitted.values,
  Residuals = lm_model$residuals
)- Create a diagnostic plot to visualize these outliers.
# Generate the plot of residuals versus fitted values
ggplot(plot_data, aes(x = Fitted, y = Residuals)) +
  geom_hline(yintercept = 0, linetype = "dashed", color = "grey") +
  geom_point(aes(color = Residuals > threshold)) +
  scale_color_manual(values = c("black", "red")) +
  labs(title = "Residual vs. Fitted Plot",
       x = "Fitted Values",
       y = "Residuals",
       color = "Threshold Exceeded") +
  theme_minimal()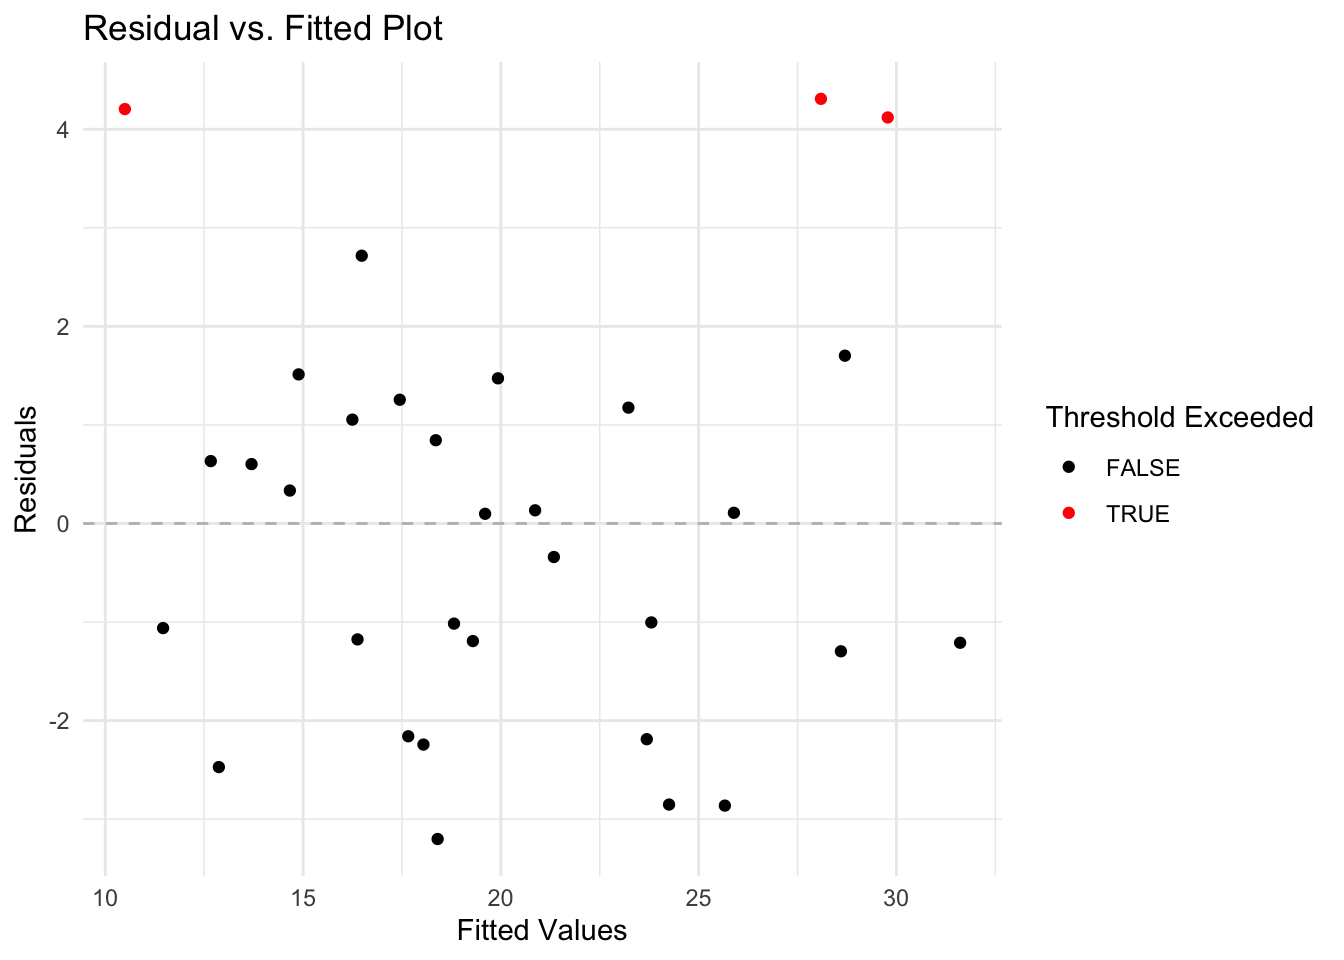
Step 4: Anomaly Detection using k-NN
- Use the
kNNdistfunction from thedbscanpackage to calculate the distance to the k-th nearest neighbor. Selectkas the square root of the number of observations.
pacman::p_load(caret, dbscan)  # Load necessary libraries
set.seed(123)  # Ensure reproducibility

mtcars.knn <- mtcars.df
k <- floor(sqrt(nrow(mtcars.knn)))  # Determine the number of neighbors
mtcars.knn$distances <- dbscan::kNNdist(x = mtcars.knn, k = k)- Identify anomalies as observations where the distance is greater than the 95th percentile of all distances.
threshold <- quantile(mtcars.knn$distances, 0.95)
mtcars.knn$IsAnomalous <- mtcars.knn$distances > threshold- Visualize these anomalies using a plot of anomaly scores.
ggplot(mtcars.knn, aes(x = row.names(mtcars.knn), y = distances, color = IsAnomalous)) +
geom_point() +
scale_color_manual(values = c("black", "red")) +
theme(axis.text.x = element_text(angle = 45, hjust = 1))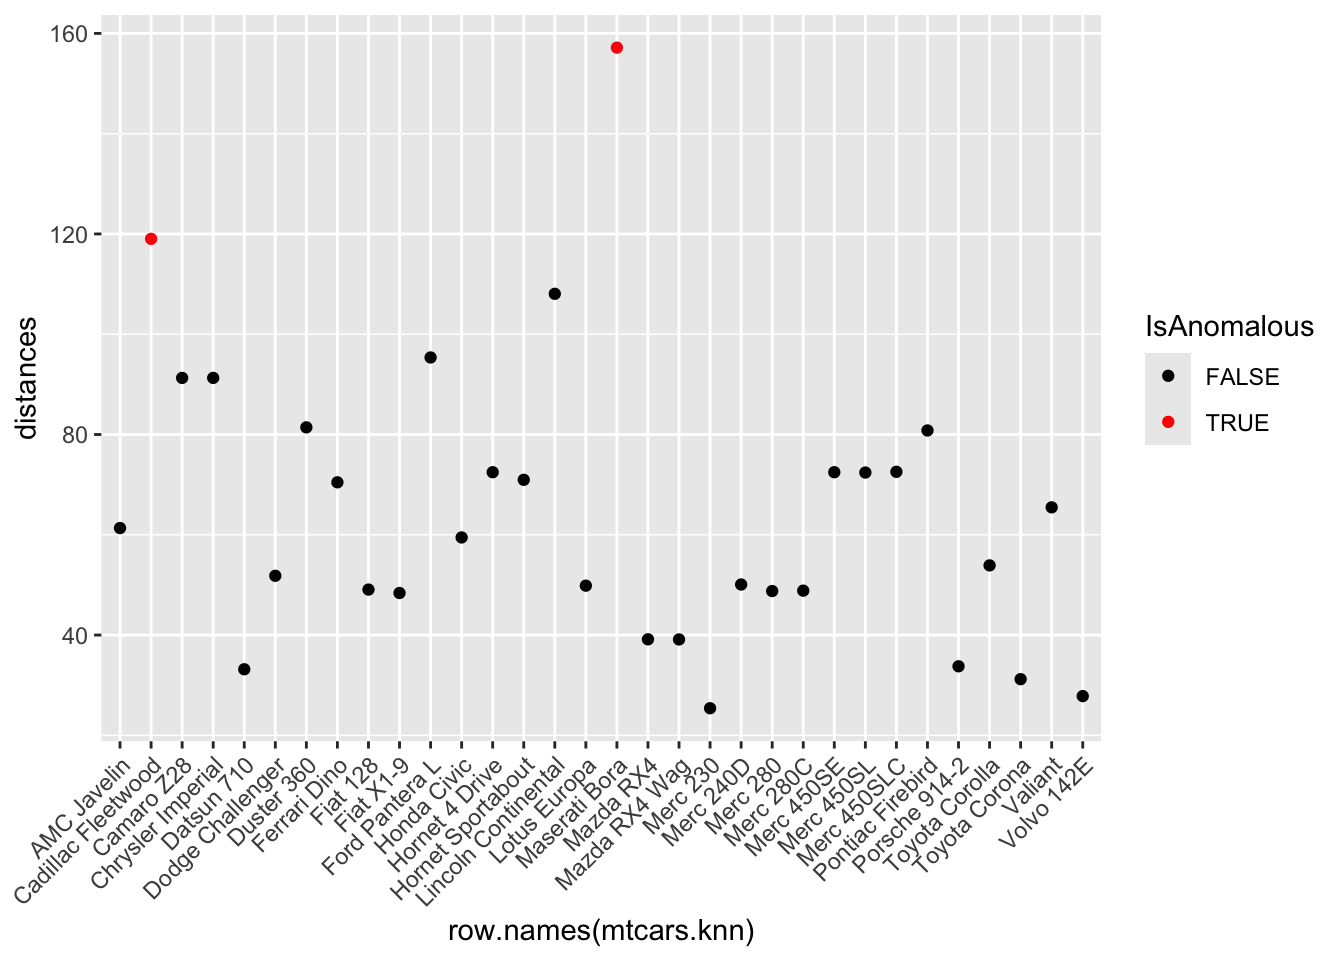 Step 5: Anomaly Detection using Random Forest
- Use the
Step 5: Anomaly Detection using Random Forest
- Use the randomForest package to fit a model on the dataset, enabling the proximity option to calculate the proximity matrix.
- Derive anomaly scores from the proximity matrix and flag instances with scores above the 95th percentile as anomalies.
mtcars.rf <- mtcars

mtcars.rf$score <- 1 - apply(rf_model$proximity, 1, mean)
anomaly_threshold <- quantile(mtcars.rf$score, 0.95)
mtcars.rf$IsAnomalous <- mtcars.rf$score > anomaly_threshold- Visualize these anomalies using a plot of anomaly scores.
pacman::p_load(ggplot2)
ggplot(mtcars.rf, aes(x = row.names(mtcars.rf), y = score)) +
 geom_line() +
 geom_point(aes(color = IsAnomalous), size = 2) +
 scale_color_manual(values = c("black", "red")) +
  theme(axis.text.x = element_text(angle = 45, hjust = 1))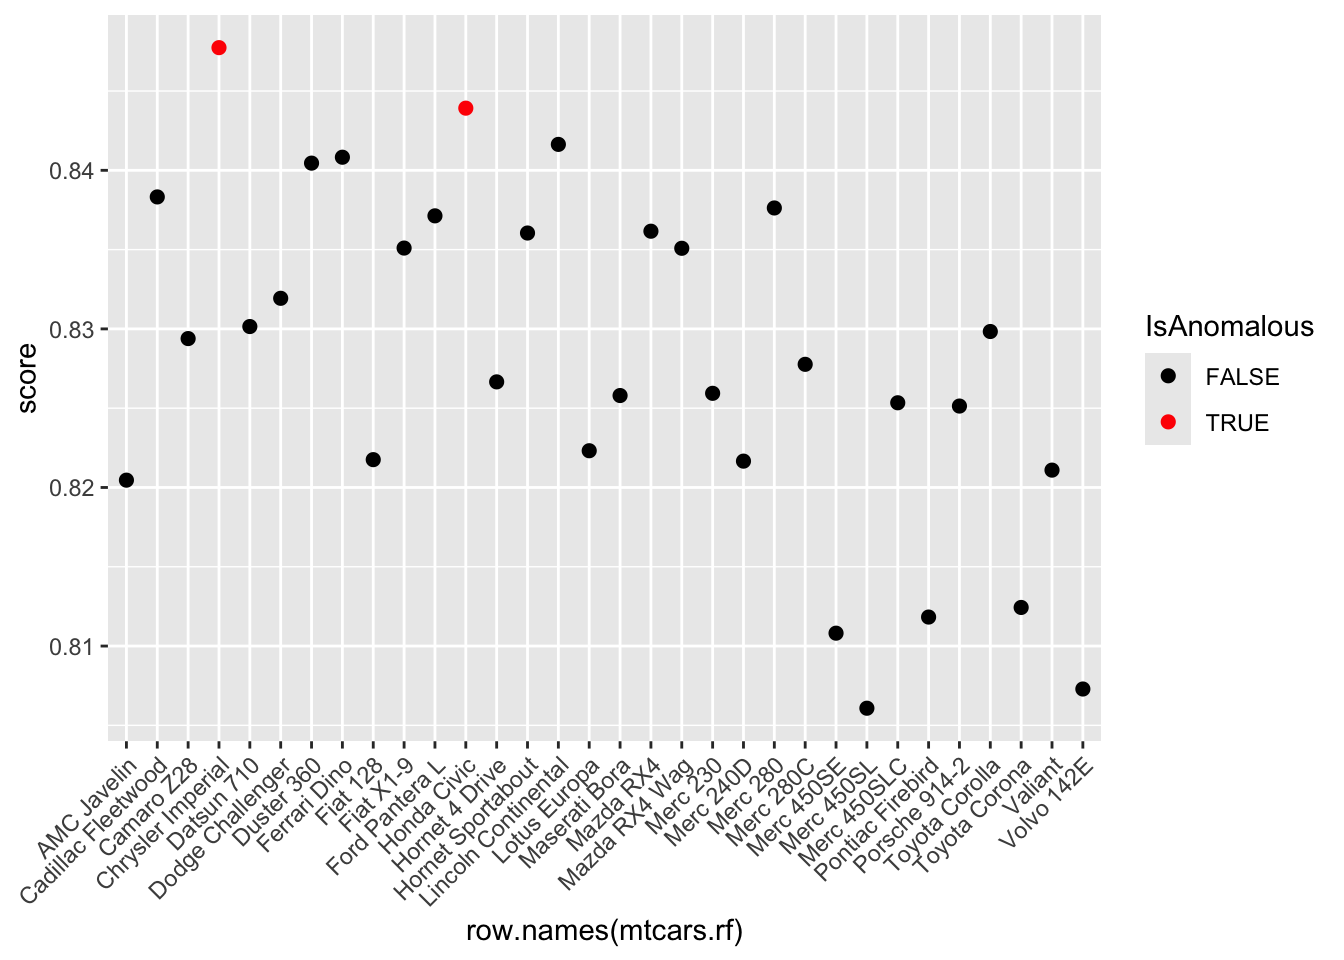
Step 6: Analysis and Comparison - Compare the results from the three methods. Identify which observations are consistently flagged as anomalies across the different techniques. - Provide a brief analysis explaining why these observations might be considered anomalies and discuss the potential implications of these anomalies on automotive performance. Highlight any noticeable differences between anomalous and non-anomalous observations.
Step 7: Report Writing - Compile your findings, including the methodology, results, and detailed discussion, into a structured Quarto document. Incorporate plots to visually support your analysis. - Conclude with your reflections on the effectiveness of each anomaly detection method used in this study.
Submission Requirements:
- Students are not required to submit their Quarto document (.qmd file). Instead, render your Quarto document to a Microsoft Word format (.docx) and submit this document.
- Ensure that the rendered Word document includes all necessary plots and outputs to comprehensively present your analysis.
Chapter 13 introduces spec-driven development — the practice of defining requirements, data specifications, and validation criteria before writing code. Chapter 14 applies this approach to plan and execute a complete analysis of the absenteeism data. Chapter 15 covers dashboards and reporting — the “last mile” where analysis reaches the decision-maker. Chapter 16 builds a complete dashboard using flexdashboard.