12.3 Identifying Anomalies Using k-Nearest Neighbors
The k-Nearest Neighbors (k-NN) algorithm is a non-parametric method commonly utilized for classification and regression. However, it can also be effectively adapted for anomaly detection. In this context, the principle is that typical data points are generally located near their neighbors, while anomalies are positioned further away. By calculating the distance to the nearest points, we can identify anomalies as those instances that have a significantly greater average distance to their neighbors compared to normal points. The following are the basic steps to search for anomalous observations Using k-NN.
Step 1: Data Preparation
pacman::p_load(fastDummies)
absenteeism.knn <- absenteeism |>
  dummy_cols(remove_first_dummy = TRUE) |>
  select(-where(is.factor))
Breaking down the code
- Dummy Variables Creation: Converts categorical variables into dummy variables.
- Remove Multicollinearity: The
remove_first_dummy = TRUEoption avoids multicollinearity by removing the first dummy variable. - Remove Factor Columns: Uses
select(-where(is.factor))to remove all factor columns, ensuring that the dataset consists only of numeric variables necessary for k-NN.
Step 2: k-NN Model Training
pacman::p_load(caret, dbscan)  # Load necessary libraries
set.seed(123)  # Ensure reproducibility

k <- floor(sqrt(nrow(absenteeism.knn)))  # Determine the number of neighbors
absenteeism.knn$distances <- dbscan::kNNdist(x = absenteeism.knn, k = k)
Breaking down the code
- Load Libraries: Loads
caretanddbscanfor modeling and distance calculation. - Set Seed: Ensures that the random processes in the model are reproducible.
- Calculate k: Determines the optimal number of neighbors using a heuristic.
- Calculate Distances: Uses
kNNdistto compute distances to the k-th nearest neighbor.
Step 3: Anomaly Detection
absenteeism.knn <-
  absenteeism |>
  mutate(distances = absenteeism.knn$distances,
         IsAnomalous = absenteeism.knn$distances > quantile(absenteeism.knn$distances, 0.95))
Breaking down the code:
- Calculate Anomaly Scores: Adds a new column for distances calculated previously.
- Flag Anomalies: Flags data points whose distances are greater than the 95th percentile of all distances as anomalies.
Step 4: Visualizing the results
Visualizing the results can help highlight the anomalies within the data.
# Plotting distances and coloring points based on anomaly status
absenteeism.knn |>
  ggplot(aes(x = 1:nrow(absenteeism), y = distances, color = IsAnomalous)) +
  geom_point() +
  scale_color_manual(values = c("black", "red"))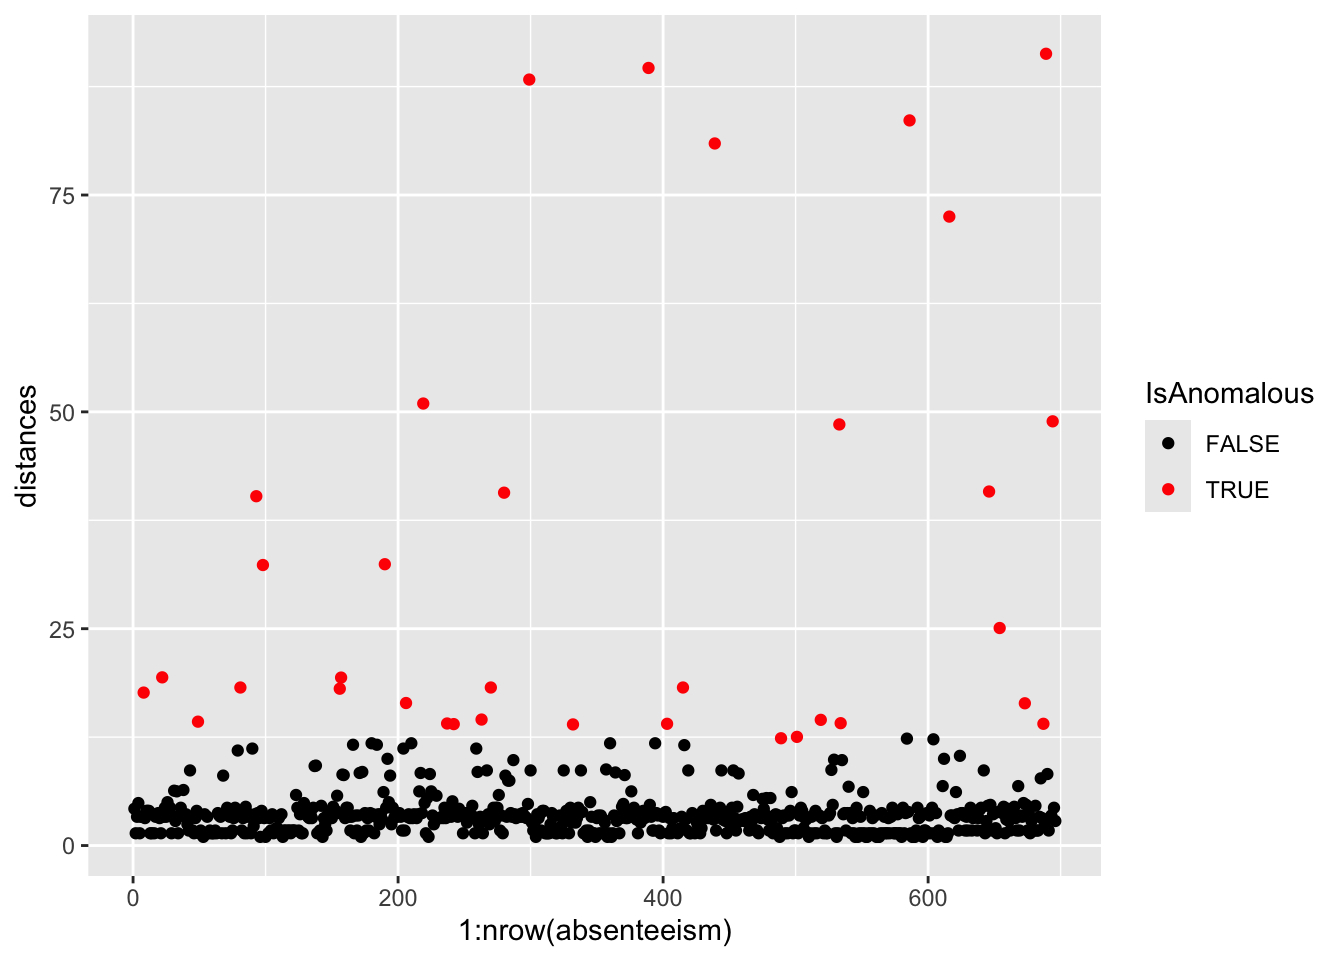
Further analysis of the identified anomalies:
# Removing 'distances' for cleaner data handling
absenteeism.knn <- absenteeism.knn |> select(-distances)

# Visualize anomalies in boxplot and barplot formats
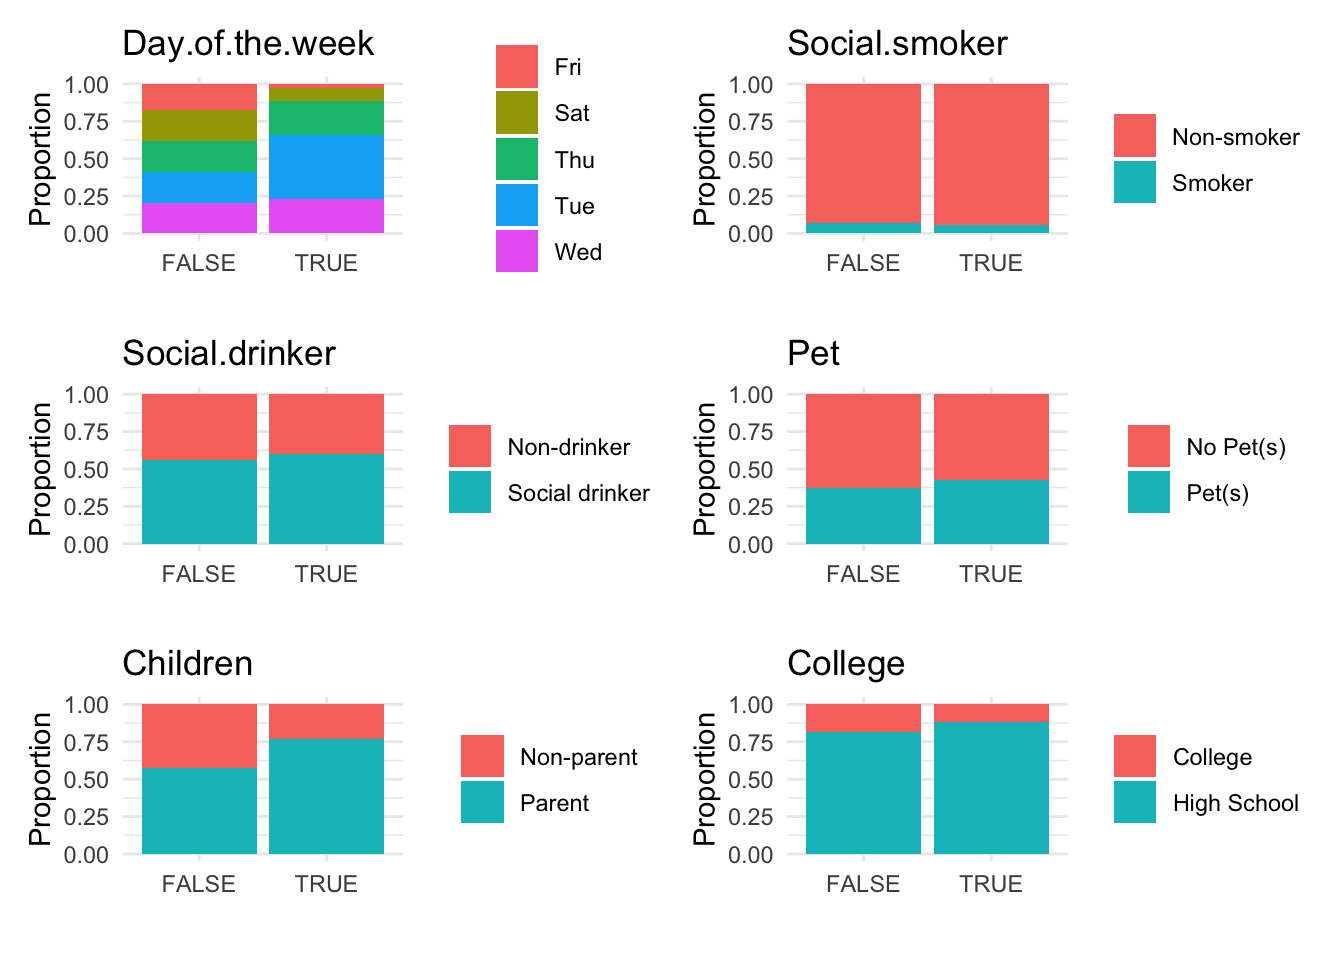
anomaly.boxplot(data = absenteeism.knn, anomaly_indicator = "IsAnomalous")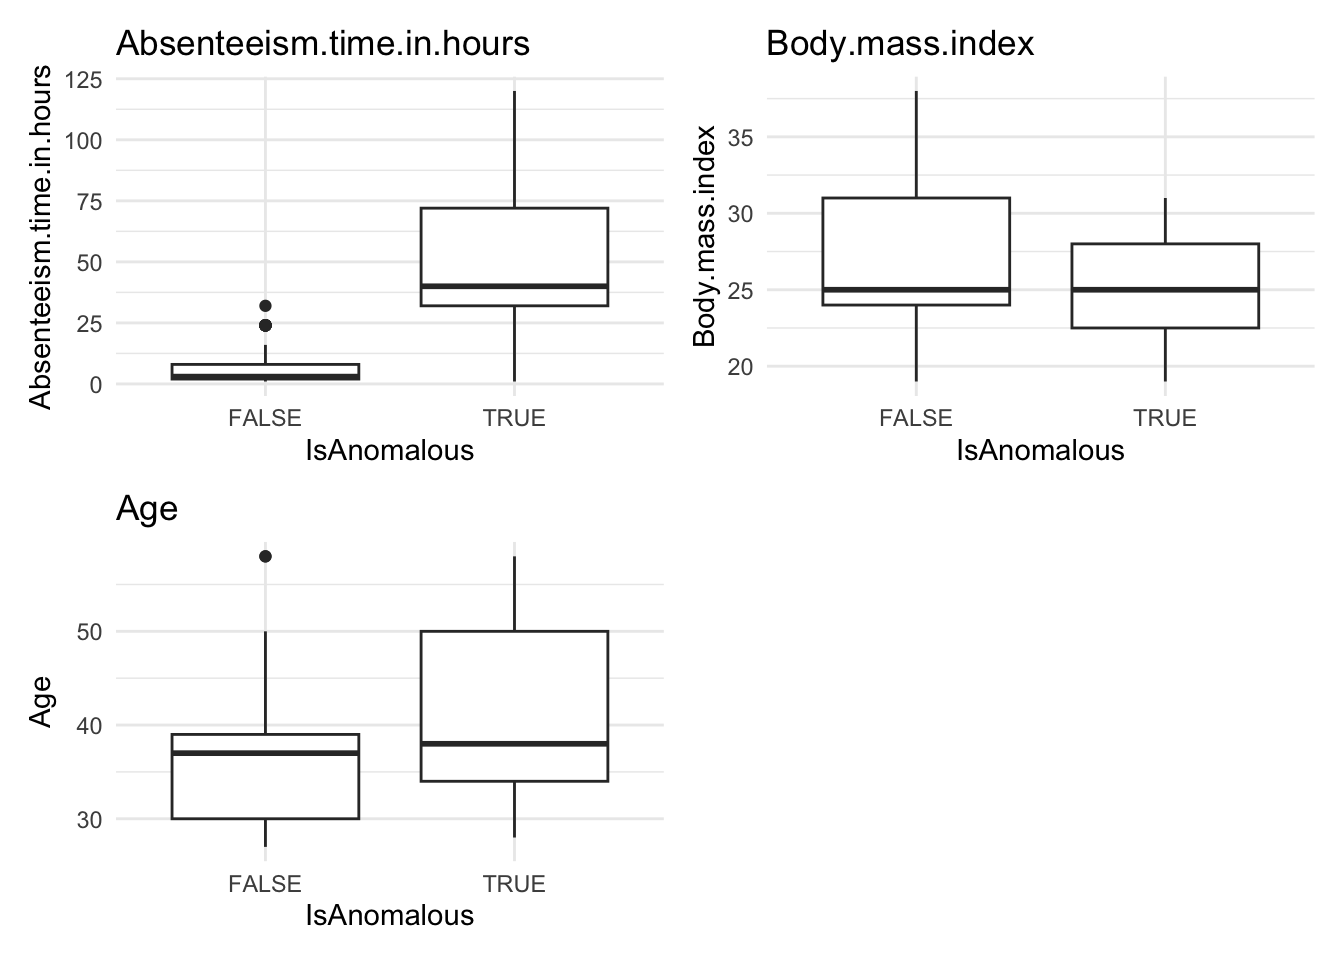
Breaking down the code:
- Visualize with Scatter Plot: Uses ggplot to plot distances and color-code anomalies.
- Data Cleanup: Removes the ‘distances’ column for cleaner data handling.
- Further Visualizations: Implements boxplots and barplots to provide different perspectives on anomalies.
This comprehensive approach not only identifies but also visually represents anomalies, leveraging the k-NN algorithm’s capability to discern deviations based on proximity to neighbors.
Here’s the homework assignment with the addition of example code for each step, using the iris dataset as a guide. This example will help students understand how to apply the instructions to the mtcars dataset.